Schwarz Software, Perth, WA
Schwarz Software Blog
How to distribute your FileMaker Runtime - creating a signed OSX installer and Windows package for distribution.
Posted 14th February 2017, updated 6th January 2019
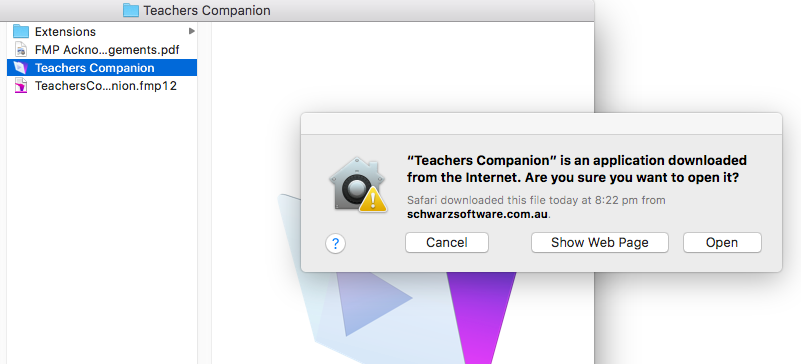
Do you have a great FileMaker app that you want to distribute as a runtime? Then read on! Note first that if you find this difficult, I offer creating a distributable package as a service, if you want to do it yourself continue reading There are two major challenges to distributing a runtime 1) The Runtime is not a single file but a folder full of files. It is best to distribute a runtime in a single file such as with an installer or a single zip file 2) You need to get past OSX's 'gatekeeper' and Windows 'smart screen' filter! This is more difficult on OSX in this case 3) Bonus challenge. If distributing on Windows you need to make sure that the end user will have 'write' permissions to the data file. OSX On OSX your basic steps are - Create the runtime using FileMaker Pro Advanced on a Mac - Codesign the runtime files with an "Apple Developer" certificate. This will allow the app to pass OSX Sierra and the GateKeeper feature. If you do not do this your end user will be asked to delete your files. - Optionally change the runtime icon using the 'get info' method in finder - To go the extra mile, you can package the runtime folder into a .app to make it a single file for the end user - Create a DMG file for distribution - Codesign the DMG - Update - you also need to Notarize your dmg installer now for Mojave and above. You can't change the filename of your DMG installer after you 'stamp' the dmg file as part of the notarization process. Fortunately notarization is no more difficult than the steps mentioned in the video. Step one of Notarization is to pass the bundle ID into the xcrun command below in terminal. The bundle ID is found in the info.plist file of the runtime app inside the bundle. Please pass your own Apple ID here for your Apple developer account: xcrun altool --notarize-app -f /Users/cs/Desktop/Test.dmg --primary-bundle-id com.filemaker.client.runtime12.test -u Developer@yoursoftware.com -p @keychain:"Application Loader: Developer@yoursoftware.com" This may take a while and return a RequestUUID. If you have issues with this you may have 2-step authentication turned on, if so see my latest blog post on notarization which explains how to get a special password for this step. - Wait for an email from Apple or periodically check the status of the notarization until it has completed. Please put in again your Apple ID and the request UUID from above. xcrun altool --notarization-info 193b7ad2-36e1-45d5-880c-c297250f77b2 -u Developer@yoursoftware.com -p @keychain:"Application Loader: Developer@yoursoftware.com" This may take a while till this tool returns success and you can run it several times. Otherwise you get an email when the app is done. Once done you get Package Approved in the call above. - Add the staple ticket to the dmg: xcrun stapler staple -v /Users/cs/Desktop/Test.dmg This will add the notarization to the disk image. Now you can test the final app in the disk image: spctl -a -v /Applications/test.app This shows on 10.13.6 only "source=Developer ID", but on Mac OS 10.14 and above shows "source=Notarized Developer ID", so it worked! Note, I have found Notarization issues if the name of the DMG file is changed after it is stamped. That is a lot of steps! Note that it isn't particularly easy, and it will cost you the price of an "Apple developer" certificate if you do not already have one. This is $150 in Australia. I offer creating a codesigned installer as a service, if you wish to use that service then contact me. The cost of codesigning from me is usually cheaper than the price of an Apple developer certificate depending on the level of customisation you require. If you do wish to do it yourself then watch the youtube video below which has the full set of instructions, and terminal commands in the comments. Another good resource for information is here: https://community.filemaker.com/thread/166157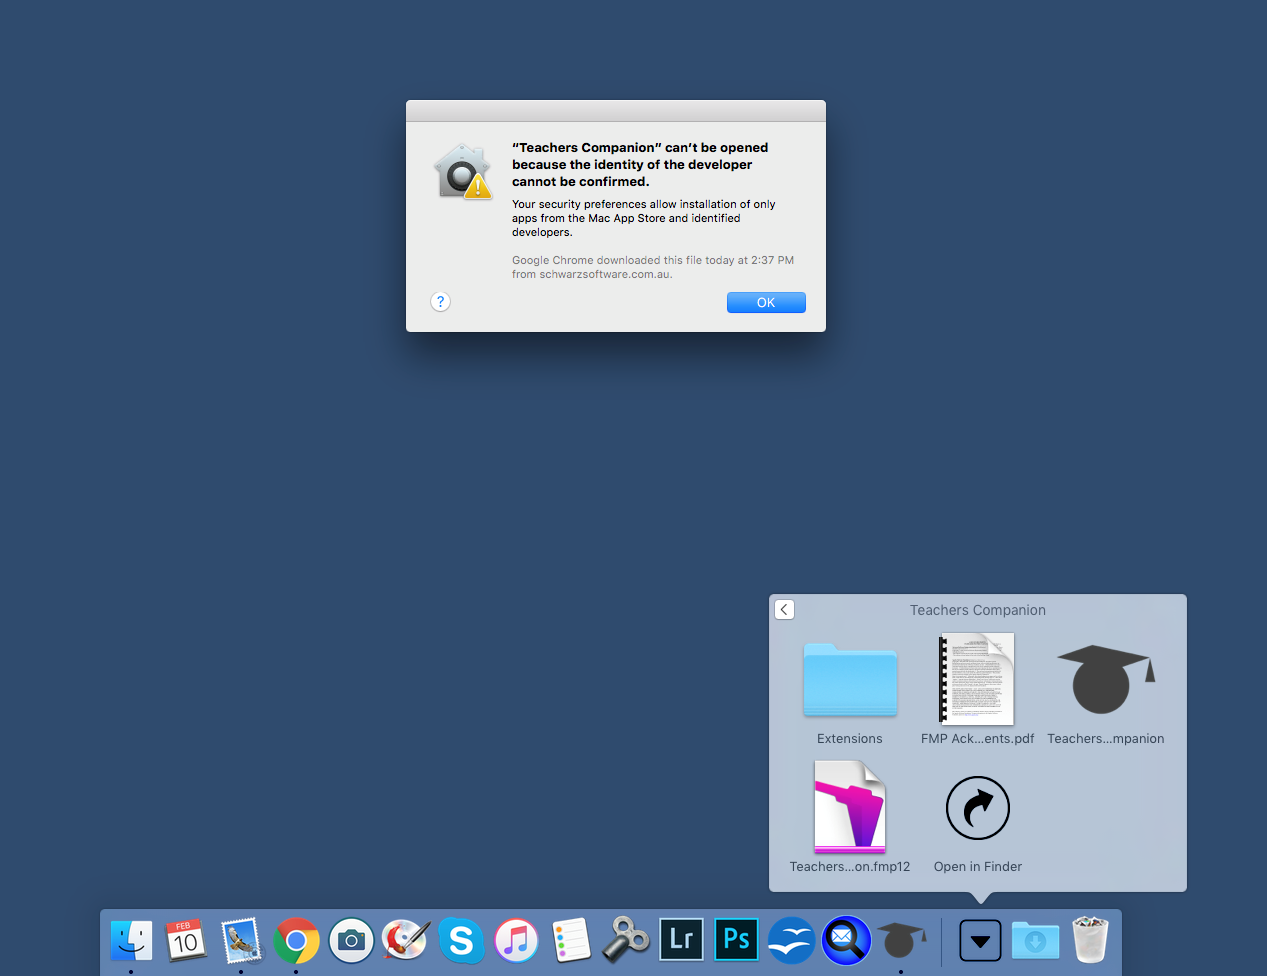 A successfully code signed installer looks like this to the end user:
 Windows
Things are a bit simpler on Windows when it comes to creating a distributable file. Your basic steps are
- Create the runtime using FileMaker Pro Advanced on a Windows PC. The runtime is already signed by FileMaker and will pass 'smart screen'
- Zip the folder and post the zip file on the web.
- Alternatively you can make an installer using 'inno setup' and codesign that installer. You will need a special 'code signing' SSL certificate for the installer to get past Windows 'smart screen'. This certificate will cost approximately $250 AUD e.g. https://au.godaddy.com/web-security/code-signing-certificate
The zip folder method is the simplest and will work well if you have your file permissions for your data file correct. I suggest adding that "all users" can have write permissions to the security settings of the data file before zipping the file.
The installer method is the most expensive but is the simplest for the end user. In the installer you can also create a post-install routine that will ensure that your end user has write permissions to the data file.
I offer creating a distributable package as a service, if you want to do it yourself you can watch the instructions in the video below:
Windows
Things are a bit simpler on Windows when it comes to creating a distributable file. Your basic steps are
- Create the runtime using FileMaker Pro Advanced on a Windows PC. The runtime is already signed by FileMaker and will pass 'smart screen'
- Zip the folder and post the zip file on the web.
- Alternatively you can make an installer using 'inno setup' and codesign that installer. You will need a special 'code signing' SSL certificate for the installer to get past Windows 'smart screen'. This certificate will cost approximately $250 AUD e.g. https://au.godaddy.com/web-security/code-signing-certificate
The zip folder method is the simplest and will work well if you have your file permissions for your data file correct. I suggest adding that "all users" can have write permissions to the security settings of the data file before zipping the file.
The installer method is the most expensive but is the simplest for the end user. In the installer you can also create a post-install routine that will ensure that your end user has write permissions to the data file.
I offer creating a distributable package as a service, if you want to do it yourself you can watch the instructions in the video below: